
How to choose the right rack cabinet for your project?
Choosing a rack cabinet is an infrastructure decision, not „buying a piece of furniture”. The right model affects network stability, device temperature, service ergonomics, physical security and the actual TCO – total cost of ownership over the entire life cycle of the installation. The cabinet determines whether replacing a switch will take 5 minutes or half a day; whether the UPS and cabling can be routed logically, or will constantly collide with the doors; whether the reserve of space and power will be sufficient for growth, or every upgrade will end with rebuilding the riser.
In practice, the right choice does not come down to „how many U and what depth”. Equally important are: the working environment (SOHO, office, server room, lab/AV — that is laboratories and audio-video systems: conference rooms, studios/broadcast, education, digital signage; where quiet operation, fast reconfiguration and easy front/rear access to devices such as HDMI/SDI/HDBaseT matrices, DSP processors, amplifiers, mixers, encoders/recorders, signage players and control controllers matter), power density (PoE, NVR, servers), cable logistics (bending radii, vertical/horizontal routing), power distribution (1U/0U PDU, power margin), acoustics and the possibility of side and rear service. The most common problems arise from a lack of headroom – U, depth, power and cooling – and from an ill-considered cable management scheme. We invite you to read our article, in which we will try to dispel all doubts.

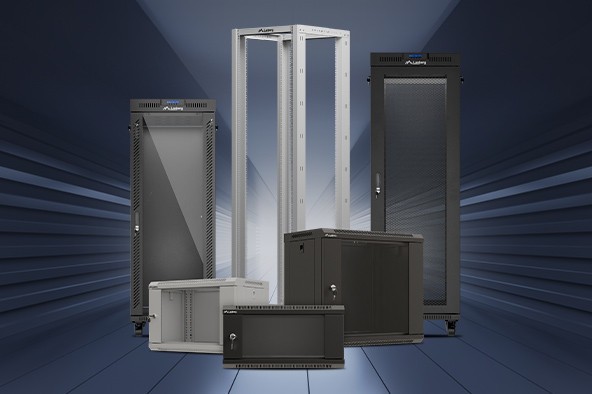
What exactly is a rack cabinet?
A rack cabinet is a standardized enclosure for mounting IT/telecom/AV equipment, based on a width of 19″ (less often 10″) and a height division into „U” units (1U = 44.45 mm). Standardization means that patch panels, switches, servers, UPS units and accessories fit the same mounting rails, and servicing is predictable. A good cabinet is not just a steel frame with a door: it is a well-thought-out airflow path, safe power distribution, earthing of elements and room for growth, which together shorten downtime and reduce operating costs.
Standards: 19″ (professional market), 10″ (SOHO — Small Office/Home Office; office, server room, lab/AV); mounting to rails with U spacing, M6 screws + cage nuts.
Cabinet body: wall-mount or floor-standing; glass/perforated doors; removable side panels; cable entries.
Objectives: order and standardization, shorter service time, better reliability, safety and aesthetics.

How to read specifications and plan dimensions?
The specification of every rack cabinet comes down to three dimensions: width (19″/10″), height (U) and depth (external and mounting – distance between the rails). Before you choose a model, inventory the equipment, sum up the U units and add a 20–30% margin. Calculate depth „in real terms”: chassis + plugs + cable bending radius. Also check load capacity (for wall-mount units), door opening direction and the possibility of reversing hinges, and for floor-standing cabinets – leveling and possible anchoring.
Height in U – the margin that saves projects
Planning „to the limit” ends with no room for organizers or an additional patch panel. A minimum buffer of 20–30% allows you to expand the installation without reorganizing the entire cabinet.
Practice: count the U of all devices, add +20–30%, plan a free 1U above particularly „hot” elements.
Depth – external and mounting dimension
For wall-mount cabinets most often 450–600 mm, for floor-standing 600/800/1000/1200 mm. Remember the actual mounting space, power/ethernet plugs and bending radii – especially for patch cords at the front.
Tip: for servers/UPS units, prefer 1000–1200 mm; for SOHO/CCTV, 600 mm will be a safe choice.
Doors and service access
Glass doors improve acoustics and enable quick visual inspection; perforated doors enhance airflow. Removable sides and sensible access to the rear shorten interventions.
Tip: wherever low noise is a priority.
Load capacity and stability
Wall-mount units are limited by the wall and brackets, so heavy elements (UPS) are an exception. In floor-standing cabinets, mount the heaviest modules low, level the cabinet and – with high loads – anchor it.
Rule: weight goes down, center of gravity stays low, safety increases.

Wall-mount cabinets – a compact distribution hub
Wall-mount cabinets are ideal for SOHO, small offices, floor distribution points (IDF) and CCTV. Typical 9–12U with 600 mm depth will hold a router/ONT, PoE switch, 1–2 patch panels and an NVR, leaving a margin for neat cable routing. In PoE and surveillance installations, heat can be a challenge – it is worth using perforated doors and a fan panel with thermostat. A limitation is often the wall load capacity; if you plan a UPS, check the permissible load and mount it on a shelf as low as possible.
When to choose: a local network node, NVR + PoE, a micro-network at home/office.
Starting dimensions: from 4U to 12U, 350–450 mm depth (margin for plugs and patch cords).
Ventilation: 2–4-fan panel + thermostat; free 1U above „heaters”.
Accessories: shelf for NVR/UPS, 1U organizer, brush panel, 1U PDU, set of M6 screws.

Floor-standing cabinets – the backbone of server rooms and larger IDF/MDF
When the number of devices and requirements regarding power, cooling and cabling grow, it is time for a floor-standing cabinet. In offices, a good starting point is 15U–32U (most often 600x600, 600x800 mm), and in server rooms from 37U–47U (from 600x1000/1200 or 800x1000/1200 mm) with perforated front/rear. Mount the heaviest modules – online UPS units, batteries – as low as possible; level the cabinet using feet or casters and anchor to the floor if needed. 1–2U blanking panels between equipment blocks improve cooling directionality and reduce „short circuits” of air streams.
When to choose: servers on slides, arrays, larger UPS units, vertical PDU, lots of cabling.
Starting dimensions: In offices, a good starting point is 22–32U (most often 800×1000 mm), and in server rooms 42–47U (800×1000/1200 mm).
Power: dual feeds, 0U PDU on both sides, at least 30% power margin.
Organization: vertical cable managers, brush entries in the top/bottom, blanking panels between devices.

Open rack – full access and maximum flexibility
An open rack (open 19″ frame) is a solution for laboratories, test benches and AV integration. The lack of an enclosure means maximum ventilation and lightning-fast reconfiguration, but it requires a controlled environment – without random movement and excessive dust.
Advantages: 360° access, quick changes, excellent thermals.
Tips: casters + cross braces, Velcro/zip ties, vertical ladders for bundles.
Limitations: reduced physical protection – suitable only for „clean” zones.

Cooling and acoustics – discipline that pays off
Cooling should be planned to support a front-to-rear airflow. Perforated doors and blanking panels limit airflow mixing. In office areas, variable-speed fans with a thermostat work well – less noise, more stable temperatures. PoE switches and NVRs can dissipate a lot of heat; leave a free 1U above them or force a higher airflow.
Best practices
Perforation front/rear, 1–3U blanking panels, free RU above hot spots.
Avoid airflow „short circuits” – separate cold and hot zones.
Monitor temperature – set alarm thresholds realistically.
Automation
Fan panels + thermostat; cooling works when needed, not „at full throttle” all the time.
Acoustics
Glass + seals in noise-sensitive areas; remember the trade-off with thermals.

Power and safety – margins bring peace of mind
Organize power through PDUs: in wall-mount cabinets – 1U; in floor-standing – vertical 0U (more outlets, shorter cords). Design with a 30% margin for outlets and power. Mount rack UPS units on slides; in critical systems consider an online UPS with maintenance bypass. Earth all cabinet elements (chassis, doors, panels) and control access to the room.
Power plan: margin ≥30% for load growth and temperature.
Topology: where possible – two independent feeds.
Safety: earthing, locks, limited panel removal.

Cable management – faster service and fewer errors
Terminate fixed cabling on patch panels and use short, labeled patch cords on devices. At the front, use horizontal organizers, and in floor-standing cabinets – vertical ladders. Brush panels allow you to route bundles from the top/bottom without losing aesthetics and reduce dust ingress. Route fiber separately, maintaining bending radii.
Organization: patch panel = boundary between fixed cabling and patching.
Ergonomics: gentle bends, slack reserves, port and bundle labels.
FO: separate paths and bending radius in line with the manufacturer’s recommendations.
Matching to the scenario – how not to overshoot
At home/in a micro-office, a 19″ wall-mount 4–12U, 350–450 mm deep will work best (for NVR/PoE: 450–600 mm). In IDF/MDF choose a 12–15U wall-mount (350–600 mm) or move to a 15–32U floor-standing — 600×600 or 600×800 mm chassis.
A „single-cabinet” server room means a 37–47U floor-standing cabinet (most often 42–47U) sized 600×1000/1200 or 800×1000/1200 mm, with perforated front/rear, vertical 0U PDUs on both sides and 1–3U blanking panels between equipment blocks.
Laboratories and AV systems will benefit from an 18–42U open rack — full access and excellent thermals, but only in controlled environments; add casters, cross braces and Velcro/zip ties.
SOHO / CCTV
Cabinet: wall-mount 9–12U, 600 mm.
Add-ons: fan + thermostat, 1U PDU, 1U organizer, shelf for NVR/UPS.
Office (IDF/MDF)
Cabinet: wall-mount 12–15U or floor-standing 22–32U.
Priorities: clear cable routing, U margin, neat front.
Server room
Cabinet: floor-standing 42–47U, 800×1000/1200 mm.
Priorities: perforated front/rear, 0U PDUs on both sides, blanking panels, tidy verticals.
Lab / AV
Cabinet: open rack 18–42U.
Priorities: quick reconfiguration, full access, Velcro/vertical organizers.

Most common mistakes and how to avoid them
Most often there is not enough U reserve and mounting depth, so plugs collide with doors and every new element triggers a „domino effect”. Just as common is underestimating cooling (PoE/NVR) and „power sized to the limit”. Heavy modules mounted high raise the center of gravity and the risk of tipping.
Headroom: +20–30% U and +30% power.
Depth: include plugs and bending radii; check depth between rails.
Thermals: perforation, fans, blanking panels; free RU above hot elements.
Stability: UPS/batteries at the bottom, leveling and possible anchoring.
Accessories that really make a difference
These are the small things that shorten service time and improve reliability. Shelves (fixed/sliding) for devices without „ears”, slides for servers, 1–2U blanking panels improving cooling directionality, 1U/0U PDUs for tidy power distribution, brush panels, organizers and a supply of M6 screws with cage nuts.
Mounting: shelves, slides, M6 kits.
Cooling: blanking panels, fans + thermostat.
Order/power: 1U/0U PDUs, organizers, brush panels, Velcro straps/zip ties.
Summary
Start choosing a rack cabinet from its role (SOHO/IDF/server room/lab), then count U and depth „in real terms”, design cooling and power with a margin, and finally take care of cable management best practices. Margins are your insurance: +20–30% U and +30% power ensure that the installation remains serviceable and ready to grow.
SOHO/CCTV: wall-mount 19″ 4–12U, 350–450 mm (for NVR/PoE: 450–600 mm); fan with thermostat, 1U PDU, free 1U above „heaters”.
IDF/MDF: wall-mount 12–15U or floor-standing 15–32U (600×600 / 600×800 mm); organizers (horizontal/vertical) and 1–3U blanking panels.
Server room: floor-standing 37–47U (most often 42–47U), 600×1000/1200 or 800×1000/1200 mm; perforated front/rear, 0U PDUs on both sides, 1–3U blanking panels, dual power feeds and ≥30% power margin.
Lab/AV: open rack 18–42U — full access and fast reconfiguration in a controlled environment; casters + cross braces, Velcro/zip ties, vertical ladders.
A well-chosen rack cabinet is an investment in stability and lower TCO – it organizes cabling, improves cooling and shortens service time. You now have a complete set of criteria to make an informed decision: from height in U and real mounting depth, through door type and cooling plan, to power distribution and accessories. Instead of „compromises for today”, choose a solution that leaves a margin for tomorrow.


